This is the first part of a tutorial where I explain how to make a Full Body FPS Controller in Unity. In this part we will set up our scene, our character and make it move with some animations.
This part will be the base of the controller and will be the same for both FinalIK and Unity’s IK version.
This tutorial is made with Unity 2019.1.9f1
1 – Tutorial introduction
In first person game there are mainly two different approaches for your character controller.
The one that we use the most is using a floating pair of arms. It’s the easiest method. Some games, even add fake legs sometimes to make you think that you aren’t just a pair of arms. It’s the method that games like Counter Strike, Insurgency, Call of Duty use.
The other one, the one we are interested in, is the Full body approach. It may seem the most straightforward approach as you can simplify it by saying that you take a full character model and put a camera between his eyes. But the fact that you have a full character model make it harder in many ways. You can encounter issues such as head stabilization, animations must look good and coherent in first person view and third person view and so on.This method is found mainly on tactical shooter games such as Arma or Ground Branch.
So if this method is harder and almost nobody uses it, why would we bother trying to do it? Well, it does look better in my opinion and it’s way more immersive. But hey, if it looks better, that’s the only thing that matters right? As someone who spent around 6-9 months trying to make it work I can’t say no 🙂
2 – Setting up our Unity scene
Before anything else we need a little testing scene, nothing too fancy, a player and a ground should be enough for now.
For the ground anything with a collider will do and for the player I will use the free SWAT character from mixamo but you can use any character.
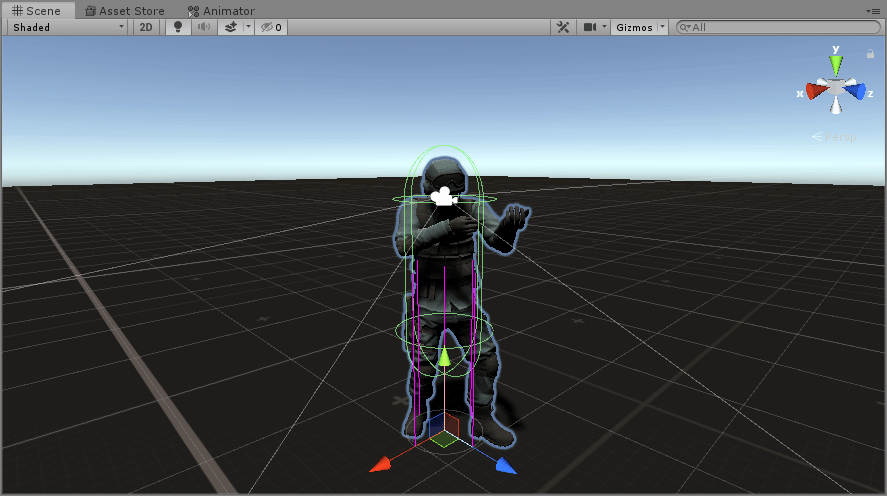
Once you have chosen your character and added it to the scene we’re going to add a Capsule Collider and a RigidBody to it. It should look like that:
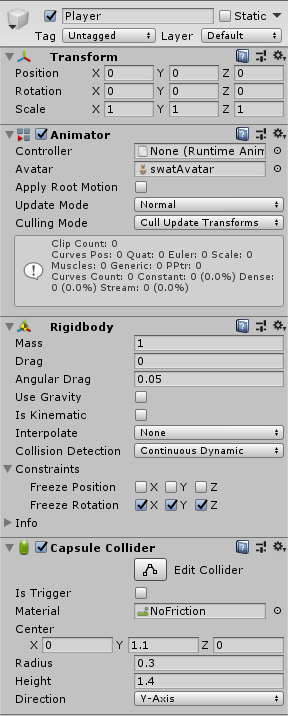
Here you might notice a few things. First, we aren’t using Unity gravity because we will add it manually later.
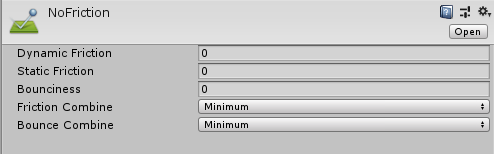
Then on the capsule collider I added a physic material with no friction so that the character will not stick to walls. Here how the material looks:
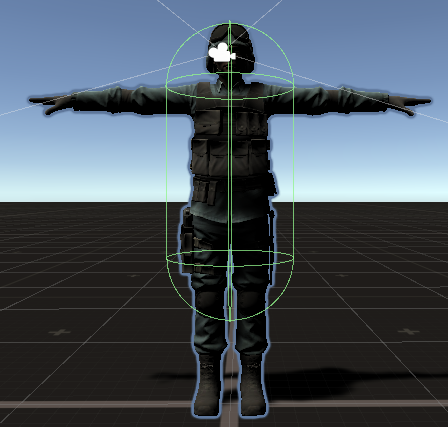
Also on the collider you can see that I moved the center up on the Y axis, and changed the radius and height to match my character. This is because we want to solve the ground collision ourselves in order to handle slopes and stairs.
Your character should look like this :
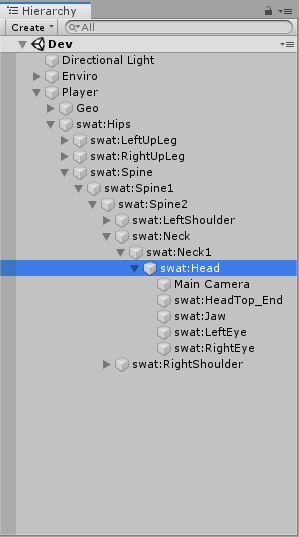
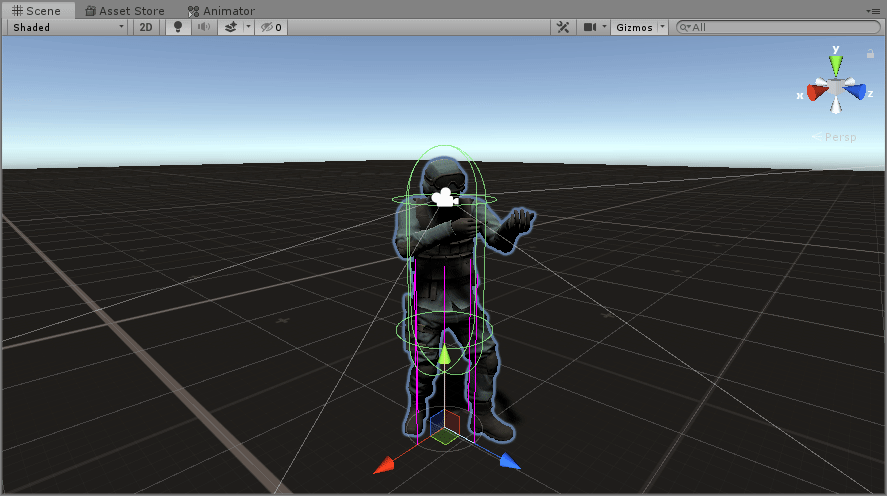
Next thing the camera. We need to put it as a child of the head bone of our character. And we move it in front of the right eye.
Note: this part might differ if you are using FinalIK or Unity’s IK. We will see why in another tutorial.
We also set the near clipping plane of the camera to the minimum (0.01). We need to do that because if not the arms and the weapon of our character could clip through the camera.
You should have something like that :
Last thing before scripting, we need to put at least an idle animation and some walking animation to our character.
I will again take the animations from mixamo. But you can use any animation you like as long as it works for your character.
Note: Unity’s IK only supports humanoid rigs, FinalIK supports both humanoid and generic. You should choose your animations and character accordingly.
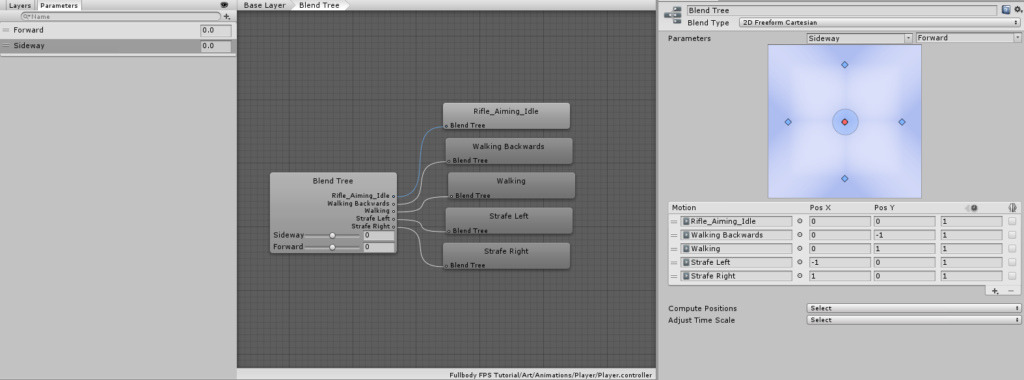
First, create an animator controller and put it on the player animator. Then inside this animator we will add two parameters : Forward (float) and Sideway (float). We will update them with the keyboard input.
We now need to create a new blend tree with the type 2D Freeform Cartesian. It should look like that:
And with that done, we can go to the interesting part: the scripts !
3 – Moving our controller
3.1 – Input management
In order to move our character we need to catch those inputs. So we’re going to create an InputManager script. And we will make it in a way that if we want we could add controller support easily. For that we will do the script in a slightly different way that you may be used to. We will be using protected variables to store our input data and public properties to expose the values. We will also need to create a protected method HandleInput where we will put the code for catching the inputs.
Let’s start by catching our movement input. For that we create two strings that will hold our Forward Axis name and our Horizontal Axis name. As said earlier, we store input values inside protected floats and make public properties to get them.
using UnityEngine;

public class InputManager : MonoBehaviour
{
    #region Variables
    [Header("Movement Axis")]
    [SerializeField]
    private string m_forwardAxis = "Vertical";
    [SerializeField]
    private string m_sidewayAxis = "Horizontal";

    protected float m_forward;
    protected float m_sideway;
    #endregion

    #region Properties
    public float Forward
    {
        get { return m_forward; }
    }

    public float Sideway
    {
        get { return m_sideway; }
    }
    #endregion

    #region BuiltIn Methods
    private void Update()
    {
        HandleInput();
    }
    #endregion

    #region Custom Methods
    protected void HandleInput()
    {
        m_forward = Input.GetAxis(m_forwardAxis);
        m_sideway = Input.GetAxis(m_sidewayAxis);
    }
    #endregion
}
- "m_" means that the variable is private (or protected) so it's not accessible from the outside.
- "t_" means that the variable is a parameter
- "_" means that the variable is public
- First letter in Upper case means that it's a property
- First letter in lower case means that it's a local variable
3.2 – Locomotion
Now that we have our inputs ready, we need to create a script that will handle the locomotion of our character. This script is inspired from Minions Art’s Character movement script. In this script we need a method UpdateMovementInput that will take the inputs from the InputManager and convert them into a Vector3. And since this script will be working with physics we are using the FixedUpdate method.
using UnityEngine;

public class Locomotion : MonoBehaviour
{
    #region Variables
    [SerializeField]
    private InputManager m_inputManager = default;

    private Vector3 m_movementDir;
    private float m_inputAmount;
    #endregion

    #region BuiltIn Methods
    private void FixedUpdate()
    {
        UpdateMovementInput();
    }
    #endregion

    #region Custom Methods
    private void UpdateMovementInput()
    {
        m_movementDir = Vector3.zero;

        Vector3 forward = m_inputManager.Forward * transform.forward;
        Vector3 sideway = m_inputManager.Sideway * transform.right;

        Vector3 combinedInput = (forward + sideway).normalized;

        m_movementDir = new Vector3(combinedInput.x, 0f, combinedInput.z);

        float inputMagnitude = Mathf.Abs(m_inputManager.Forward) +
            Mathf.Abs(m_inputManager.Sideway);
        m_inputAmount = Mathf.Clamp01(inputMagnitude);
    }
    #endregion
}
Then we handle the physical part. We need a FindFloor method and a UpdatePhysics method. The FindFloor method will make five raycasts around the character and calculate the average height of the floor. Those raycasts start from the capsule collider center. The length of the raycasts will be equal to the half of the capsule collider height + the offset that we expose in the inspector.
The UpdatePhysics method will check where the ground is. If our player is not grounded then we should add gravity to make it fall down. Then we need to update the velocity of the rigidbody using our previously calculated Vector3 movementDir that store our inputs. And finally we adjust the rigidbody position if we are grounded so that the player is at the correct height.
    ...

    [SerializeField]
    private Rigidbody m_rb = default;
    [SerializeField]
    private CapsuleCollider m_collider = default;
    [SerializeField]
    private float m_offsetFloorY = 0.4f;
    [SerializeField]
    private float m_movementSpeed = 3f;

    ...

    private Vector3 m_raycastFloorPos;
    private Vector3 m_combinedRaycast;
    private Vector3 m_gravity;
    private Vector3 m_floorMovement;
    private float m_groundRayLenght;

    ...

    private void UpdatePhysics()
    {
        m_groundRayLenght = (m_collider.height * 0.5f) + m_offsetFloorY;

        if (FloorRaycasts(0, 0, m_groundRayLenght).transform == null)
        {
            m_gravity += (Vector3.up * Physics.gravity.y *
                Time.fixedDeltaTime);
        }

        m_rb.velocity = (m_movementDir * m_movementSpeed * m_inputAmount)
            + m_gravity;

        m_floorMovement = new Vector3(m_rb.position.x, FindFloor().y,
            m_rb.position.z);

        if (FloorRaycasts(0, 0, m_groundRayLenght).transform != null &&
            m_floorMovement != m_rb.position)
        {
            m_rb.MovePosition(m_floorMovement);
            m_gravity.y = 0;
        }
    }

    private Vector3 FindFloor()
    {
        float raycastWidth = 0.25f;
        int floorAverage = 1;

        m_combinedRaycast = FloorRaycasts(0, 0, m_groundRayLenght).point;
        floorAverage += (GetFloorAverage(raycastWidth, 0) +
            GetFloorAverage(-raycastWidth, 0) + GetFloorAverage(0,
            raycastWidth) + GetFloorAverage(0, -raycastWidth));
        return m_combinedRaycast / floorAverage;
    }

    private RaycastHit FloorRaycasts(float t_offsetx, float t_offsetz,
        float t_raycastLength)
    {
        RaycastHit hit;

        m_raycastFloorPos = transform.TransformPoint(0 + t_offsetx,
            m_collider.center.y, 0 + t_offsetz);
        //Debug.DrawRay(m_raycastFloorPos, Vector3.down *
            m_groundRayLenght, Color.magenta);

        Physics.Raycast(m_raycastFloorPos, -Vector3.up, out hit,
            t_raycastLength);

        return hit;
    }

    private int GetFloorAverage(float t_offsetx, float t_offsetz)
    {
        if (FloorRaycasts(t_offsetx, t_offsetz,
            m_groundRayLenght).transform != null)
        {
            m_combinedRaycast += FloorRaycasts(t_offsetx, t_offsetz,
                m_groundRayLenght).point;
            return 1;
        }
        else
        {
            return 0;
        }
    }
Note – line 24 : ” m_groundRayLenght = (m_collider.height * 0.5f) + m_offsetFloorY;” is in the update for easy customization at runtime. Once you’ve found the good offset value you should put this line inside the Start method
And then don’t forget to call UpdatePhysics in the FixedUpdate method
    private void FixedUpdate()
    {
        UpdateMovementInput();
        UpdatePhysics();
    }
So now if you it play and try moving around it should look like this:
You might have guessed what’s missing. In the first part of this tutorial I said that we needed to create some parameters for our animator. Two floats (Forward and Sideway). So let’s feed them with some inputs to see what it does.
We need to get our character animator in the script so add an Animator field. Then let’s create an UpdateAnimation method and call it in the FixedUpdate.
    ...

    [SerializeField]
    private Animator m_animator = default;

    ...

    private void FixedUpdate()
    {
        UpdateMovementInput();
        UpdatePhysics();
        UpdateAnimation();
    }
The UpdateAnimation method is pretty simple by itself. We just use the SetFloat method from the animator and give our input values as parameters.
    private void UpdateAnimation()
    {
        m_animator.SetFloat("Forward", m_inputManager.Forward);
        m_animator.SetFloat("Sideway", m_inputManager.Sideway);
    }
It should look better now.
For better results we could have used more animations for Front Right, Front Left etc, but for now it should be enough. This tutorial is for a first person controller so let’s take a look a the game window.
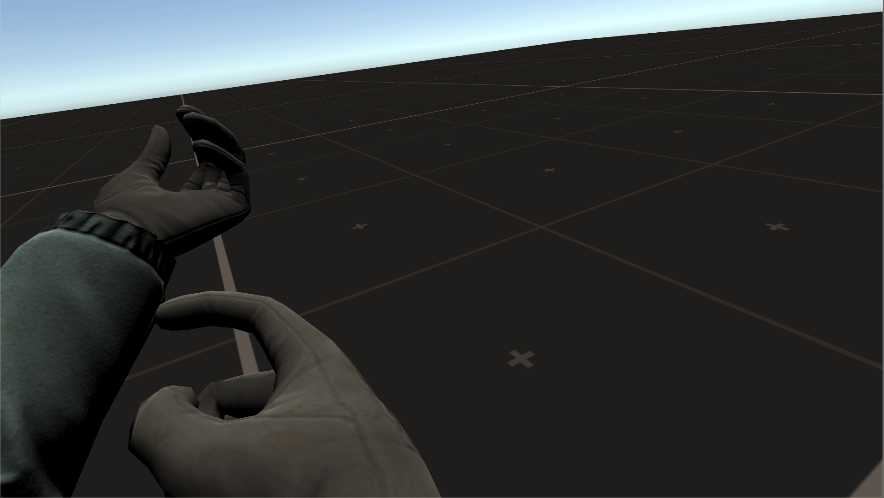
You may wonder why does it looks like there is an earthquake on the screen. We will see that in the part 2 but I’ll make a short explanation.
The head movement we see in game is completely natural as it occurs in real life. But in real life you don’t notice it because of multiple systems that our brain uses to stabilize the image. So in the next part we will look in more details on how to fix this issue. And we will set up an IK system for the upper body of our character.
In the meantime, if you want to learn more about the head stabilization issue I highly recommend you to take a look at this video from Star Citizen’s developers. They explain how they solved the issue and that’s how I did it too.
4 – Conclusion
Now that we have the base for our controller we will start looking at more difficult parts, such as the upper body IK system.
You should also note that the input management and locomotion system that we did here can be reused (with some tweaking) on other controllers such as Top Down or Third Person.
Github Repository